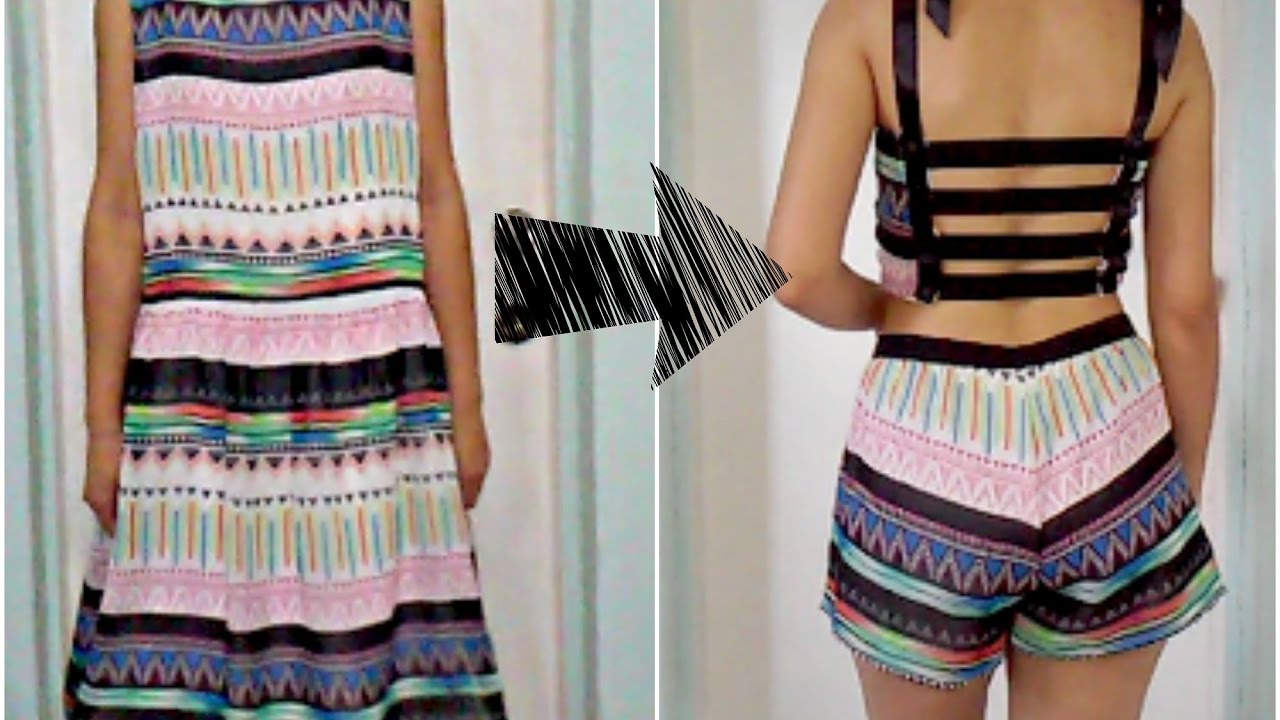
DIY clothes offer a unique opportunity to express your personal style and create garments that truly reflect your individuality. From simple alterations to complex designs, the world of DIY fashion empowers you to take control of your wardrobe and craft pieces that are both stylish and meaningful.
The benefits of making your own clothes extend beyond just personal expression. It allows you to create clothing that fits perfectly, choose sustainable fabrics, and even save money on your wardrobe. Whether you’re a seasoned sewer or a complete beginner, there’s a DIY clothing project out there for everyone.
Basic Sewing Techniques
Sewing is a fundamental skill that allows you to create a wide range of garments and home décor items. Whether you are a beginner or a seasoned sewer, mastering basic sewing techniques is essential for achieving professional-looking results. This guide will walk you through the essential techniques, including stitching, hemming, and buttonholes.
Stitching
Stitching is the foundation of sewing, connecting fabric pieces together. There are various types of stitches, each serving a specific purpose.
- Straight stitch: This is the most common stitch used for joining fabric pieces. It is a simple stitch that creates a strong and durable seam.
- Zigzag stitch: This stitch is used for finishing edges to prevent fraying and for creating decorative effects. It is also used for attaching elastic or other stretchy materials.
- Backstitch: This stitch is used for reinforcing seams, particularly at the beginning and end of stitching lines. It creates a secure and durable seam.
When stitching, it is important to choose the appropriate stitch length and tension for the fabric and project. Experiment with different settings on your sewing machine to find the optimal settings for your fabric.
Hemming
Hemming is the process of finishing the raw edge of a garment or fabric. It involves folding the edge under and stitching it down to create a neat and finished look.
- Machine hemming: This is the most common method for hemming, using a sewing machine to stitch the hem in place.
- Hand hemming: This method involves using a needle and thread to hand-stitch the hem in place. It is a more time-consuming process but can be used for delicate fabrics or when a more precise finish is desired.
When hemming, it is important to choose a hem width that is appropriate for the garment and fabric. A wider hem is typically used for heavier fabrics, while a narrower hem is used for lighter fabrics.
Buttonholes
Buttonholes are openings in fabric that allow buttons to be attached. They are essential for creating functional and aesthetically pleasing garments.
- Machine buttonholes: Most modern sewing machines have a buttonhole feature that allows you to create buttonholes automatically.
- Hand-sewn buttonholes: This method involves using a needle and thread to hand-stitch the buttonhole. It is a more time-consuming process but can be used for delicate fabrics or when a more precise finish is desired.
When making buttonholes, it is important to measure the button carefully to ensure that the buttonhole is the correct size. It is also important to use the correct buttonhole foot on your sewing machine to create a clean and even buttonhole.
Using a Sewing Machine for Different Types of Fabrics
Sewing machines are versatile tools that can be used for a wide range of fabrics. However, different fabrics require different settings and techniques.
- Light fabrics: These fabrics, such as silk or chiffon, require delicate handling. Use a fine needle and a lower stitch length to prevent the fabric from puckering.
- Medium-weight fabrics: These fabrics, such as cotton or linen, are generally easy to sew. Use a medium-weight needle and a standard stitch length.
- Heavy fabrics: These fabrics, such as denim or canvas, require a strong needle and a longer stitch length. Use a walking foot to help feed the fabric through the machine evenly.
- Stretchy fabrics: These fabrics, such as jersey or spandex, require a special needle and a zigzag stitch to prevent the fabric from stretching out of shape.
Experiment with different settings on your sewing machine to find the optimal settings for each fabric.
Troubleshooting Common Sewing Problems
Sewing can be challenging, and even experienced sewers encounter problems from time to time. Here are some common sewing problems and their solutions:
- Puckering: This occurs when the fabric is pulled too tightly during stitching. To prevent puckering, use a lighter touch when stitching and make sure that the fabric is feeding through the machine evenly.
- Skipped stitches: This can be caused by a dull needle, improper thread tension, or a dirty sewing machine. Replace the needle, adjust the thread tension, and clean the sewing machine to resolve this issue.
- Broken thread: This can be caused by a knot in the thread, a dull needle, or improper thread tension. Remove any knots in the thread, replace the needle, and adjust the thread tension to prevent this problem.
- Uneven stitching: This can be caused by a dirty sewing machine, a worn-out needle, or improper thread tension. Clean the sewing machine, replace the needle, and adjust the thread tension to ensure even stitching.
By understanding the causes of common sewing problems, you can quickly and effectively troubleshoot them and get back to sewing.
DIY Clothing for Different Occasions

Crafting your own clothes is a rewarding experience that allows you to express your unique style and create pieces that perfectly fit your body and personality. From casual everyday wear to formal events and special occasions, DIY clothing offers endless possibilities for personalizing your wardrobe.
Choosing Fabrics and Designs for Different Occasions
Selecting the right fabrics and designs is crucial for creating outfits that are both stylish and appropriate for the occasion.
- Casual Wear: For everyday outfits, prioritize comfort and practicality. Opt for breathable fabrics like cotton, linen, or jersey. Choose loose-fitting styles like t-shirts, jeans, skirts, and dresses. Consider incorporating playful prints, patterns, or embroidery to add a personal touch.
- Formal Events: When dressing for formal occasions, choose fabrics that exude elegance and sophistication. Silk, satin, velvet, or lace are excellent choices. Opt for tailored designs like dresses, pantsuits, or gowns. Keep the colors classic and neutral, such as black, white, navy, or silver. Add a touch of sparkle with sequins or beading for a glamorous touch.
- Special Occasions: Special occasions call for unique and memorable outfits. Experiment with different fabrics and textures to create a statement piece. For weddings, consider a flowy maxi dress in a light and airy fabric like chiffon or organza. For a birthday party, choose a vibrant and playful print or a bold color. Remember to tailor the design to the specific occasion and theme.
DIY Clothing for Different Body Types
Creating clothes that flatter your unique body shape is a key aspect of DIY fashion. By choosing patterns and designs that accentuate your best features and minimize areas you’d like to downplay, you can create garments that make you feel confident and comfortable.
Finding Flattering Patterns and Designs
The first step in crafting DIY clothes that flatter your body type is selecting patterns and designs that complement your shape. Understanding your body type can help you choose styles that emphasize your assets and minimize areas you wish to downplay.
- Hourglass: This body type is characterized by a defined waist and curves in both the bust and hips. Choose fitted tops and dresses that cinch in at the waist, and avoid overly baggy or shapeless styles. Look for A-line skirts or dresses that flow from the waist, and consider adding a belt to accentuate your waistline.
- Pear: This body type has a wider hip area than bust. Balance your proportions by opting for tops that draw attention to your shoulders and neck. Choose A-line skirts or dresses that flow from the waist, and consider wearing wider-leg pants or jeans to create a more balanced silhouette.
- Apple: This body type has a fuller bust and stomach area. Choose empire waist tops and dresses that accentuate your bust and create a more balanced silhouette. Opt for A-line skirts or dresses that flow from the waist, and avoid styles that cling to the midsection.
- Rectangle: This body type has a straight shape with a less defined waist. Create curves by choosing tops with ruffles or embellishments, and look for A-line skirts or dresses that add volume to the hips. Consider wearing a belt to define your waistline.
- Inverted Triangle: This body type has broader shoulders than hips. Create a more balanced silhouette by choosing tops that are fitted through the bust and shoulders, and opt for A-line skirts or dresses that add volume to the hips. Consider wearing wider-leg pants or jeans to create a more balanced silhouette.
Adjusting Patterns for Individual Measurements
While patterns are a great starting point, they often require adjustments to fit your unique measurements. Here are some helpful tips for adjusting patterns to achieve a perfect fit:
- Take Accurate Measurements: Before you begin any adjustments, take accurate measurements of your bust, waist, hips, and other relevant areas. This will ensure that your adjustments are based on your specific measurements.
- Use a Muslin: Before cutting into your final fabric, create a muslin (a test garment made from inexpensive fabric) to test the fit of the pattern. This will allow you to make any necessary adjustments before you cut your final fabric.
- Adjust the Seam Allowances: If the pattern is too large or too small, you can adjust the seam allowances to achieve a better fit. You can add or subtract seam allowance to make the garment larger or smaller, respectively.
- Make Dart Adjustments: Darts are used to shape the fabric and create a more flattering fit. If the pattern is too loose or too tight in specific areas, you can adjust the darts to achieve a better fit.
- Add or Remove Length: You can adjust the length of a garment by adding or removing fabric at the hem. This is a simple adjustment that can make a big difference in the overall fit and style of the garment.
Inspiration for Stylish and Comfortable DIY Clothes
Once you’ve mastered the basics of pattern adjustment, you can start experimenting with different styles and designs to create DIY clothes that are both stylish and comfortable.
- Experiment with Fabrics: There are endless possibilities when it comes to fabric choices. Experiment with different textures, weights, and patterns to find fabrics that suit your personal style and the occasion.
- Incorporate Unique Details: Add personal touches to your DIY clothes with unique details like lace trim, buttons, embroidery, or embellishments.
- Embrace Trends: Keep an eye on current fashion trends and incorporate them into your DIY projects. For example, you could create a trendy oversized sweater or a flowy maxi dress.
- Mix and Match: Don’t be afraid to mix and match different patterns, textures, and colors to create unique and stylish outfits.
DIY Clothing for Sustainability: Diy Clothes

DIY clothing is more than just a hobby; it’s a conscious choice for a more sustainable wardrobe. By creating your own clothes, you can actively combat the environmental impact of fast fashion and embrace a more mindful approach to fashion.
Environmental Impact of Fast Fashion, Diy clothes
Fast fashion is a major contributor to environmental pollution and resource depletion. The industry relies on cheap, often synthetic materials that are difficult to recycle and contribute to microplastic pollution. The rapid production cycles lead to a constant stream of new clothing, encouraging overconsumption and creating massive amounts of textile waste.
Benefits of DIY Clothing
Creating your own clothes allows you to choose sustainable materials and reduce textile waste. By using natural fibers like cotton, linen, or hemp, you can minimize your environmental footprint. You can also repurpose old clothes and fabrics, giving them a new life and reducing the need for new materials.
Choosing Sustainable Materials
When choosing materials for your DIY projects, prioritize natural fibers like cotton, linen, hemp, and wool. These materials are biodegradable and have a lower environmental impact than synthetic fibers. Consider organic cotton, which is grown without harmful pesticides and fertilizers.
Sustainable DIY Practices
- Reduce textile waste: Repurpose old clothes, fabrics, and buttons to create new pieces. This minimizes the need for new materials and reduces textile waste.
- Choose recycled fabrics: Opt for recycled fabrics made from pre-consumer or post-consumer waste. This helps reduce the demand for virgin materials and promotes a circular economy.
- Minimize water usage: Choose fabrics that require less water for production and washing. Look for materials like hemp or linen, which are naturally water-resistant.
- Repair and mend: Extend the life of your clothes by repairing and mending them instead of discarding them. This reduces waste and encourages a more mindful approach to clothing.
- Buy secondhand: When purchasing new materials, consider buying secondhand fabrics or clothes. This helps reduce the demand for new production and gives pre-loved items a new life.
Final Conclusion
Embarking on the journey of DIY clothes opens a world of creative possibilities. With the right tools, techniques, and inspiration, you can transform your fashion dreams into reality. So, gather your supplies, unleash your inner designer, and let your creativity flourish as you craft unique and personalized garments that reflect your individual style.
DIY clothes can be a fun and rewarding experience, allowing you to express your unique style and create pieces that truly reflect your personality. Just like with DIY clothes, you can also add a touch of personal flair to your home by creating a stunning accent wall.
For some inspiring ideas on how to transform a plain wall into a statement piece, check out these diy accent wall ideas. Whether you’re a seasoned DIYer or a beginner, these projects are sure to inspire you to add a personal touch to your living space, just like you would with your DIY clothes.


